Showing posts with label DIY. Show all posts

Sunday, 15 December 2013

Organizing Car:


One sixer after the other!
I had a very productive week as I spent most of time amidst organizing tools, pretty wrapping sheets, beads, glues, and of course clutter as well. Excitement of de-cluttering a space is so rewarding that it sets the momentum; you don’t want to stop and starts another project on your to-do list. Energy, of seeing a space respiring, gets you going.
So, your highness, I folded my sleeves and decided to give my brother a favor by asking him if I could clean/organize his car. He, happily, said yes! He was grinning when I said, “your car is so unorganized that it will get me perfect before and after pictures”. But I stopped chuckling when I opened the door and found out there was lot that needed my attention. First thing first, let me help you have a look at my brother’s car.      
 
Grey, vitz, is what I intend to take a crack at. So, mission started with making a space in the garage and taking the black bird out.
Yeah, that’s what I’m talking about. It doesn’t seem to be affected by my brother’s careless care-free nature from outside. I know you must be very excited to peek inside as I once was, sighing! Get ready, don’t laugh what you are about to see but you are free to relate if your (or your loved ones) car seems something like this. Here is another one!

  When I opened the front drawer, voila! A flood of papers and technical gadgets came out (some ketchup too).

I started off with cleaning the rugs, what a bad idea that was. I cleaned, and cleaned, and cleaned and continued cleaning for good half an hour but those rugs seemed to have secretly holding on to all the sand of Sahara Desert.
Please say, it seems little better. O thanks a lot! Now I’m done with all the sand on the ground, and it’s time to deal with the paper clutter that rested hmmmm everywhere. For I to contend with papers, I first needed to understand their kind. I categorized them in four piles.


1)         Important documents: Like car registration papers, driving license, car related warranties etc. Storage type: Permanent
2)         Entry tickets: These tickets needed to be stored temporary for like a month or so.
3)         Paper Money: It needed secret, but easily accessible storage.
4)         Trash: to be thrown out that instant.
Sorting out made it much easier: divide and conquer. I must notify here that vitz comes with lots…n lots of compartments so it’s definitely an organized car by its very nature. So, for many things, I used built-in storage.
Let’s start with important documents. Such kind of documents needed to be kept secured. Poly envelope? What an idea! I nicely folded important documents and put them in a poly envelope, labeled it and TADA!


Things started coming together at last. I chose front drawer for important papers along with techy gadgets and a body spray. Front drawer is easily accessible, large enough to hold these many things and keep things out of reach for kids.

Entry tickets couldn’t be stored in a drawer like that as they needed to be easily reached within seconds. Also, I know my brother, he wouldn’t have used a system that required hard work and would have allowed entry tickets to wander instead of opening and closing a poly envelope twice a day. Thinking! Thinking! Thinking! Whoa! Solution was as simple as a paper clip. I just needed a paper clip to encage all the papers.

 Money, I stored in a small compartment near the steering wheel and trash was thrown out. Next biggest challenge was wires. I had two options. Either use one of already built-in compartments or hang them on an adhesive hook, stuck to the side door, like this:
I liked adhesive hook idea more; but, unfortunately, it wasn’t my car and my brother didn’t want a girly hook with a flower on it. Yeah, sad it is! Now I was forced to put wires in the little compartment beneath the steering wheel. But, I am happy as long as wires are contained and organized.


Much better, right?  But, I’m not done yet. I reckoned this car needed what could keep it organized. Yes, a dustbin! I had something that was perfect but lacked color, fun and glam.

I use a piece of fabric and stuck it to the container using all-purpose glue. How cute is this?

For label, I re-purposed a gift card (white base) and a wedding card (golden netted circle): Match made in heaven. This basket is sturdy, looks elegant, gives combo of beautiful colors and above all seems picture-perfect.
 Here’s the final look!


I wish I could have it imprinted on the windshield, " You have every right to keep it clean." Hope, you are still with me.
 
Do give me your feedback. Till then,

Saturday, 14 December 2013

Repurposing Pringles CANs:


Heaps of love for all of you!
I’m finally breathing – I’m finally ready to share what I did with Pringles cans. It’s not that this project will make you jump off the cliff; rather, it’s a very quick sort of a project. But, it was getting deferred for no apparent reason (I had a budget season to deal with).
Fasten your seat belt as you are going to join me on the way to the land of stunning simplicity. Ride is going to be salty, smoky, BBQ flavored and mouth-watering.  
Originally, I had thought of using fabric to wrap these jars but when I was raiding shopping a stationery store, I found a very cute gift wrapping sheet that for this project seemed perfect. So, I came back home and went on with the original idea but replaced fabric with the wrapping sheet.
For sticking it to the can, I used all-purpose adhesive glue that worked brilliantly, didn’t leave any residue and was super comforting to work with.

Doesn’t it look cute? If you are nodding your head in yes, please accept my virtual hug. I intend to use one of them as pen holder and the other one as my new super awesome stand for brushes.
Budget??
Wrapping sheet: PKR 20, white stones = my mother’s gift, Glue stick = PKR 50 => PKR 100 (Less than a dollar).
They are making me smile, voicing my hope that anything can be turned into gold. It just needs little love and determination to make it happen.
Did you find this quick project inspirational? And if you have done any such DIY project, I would love to hear from you. Till then,
 

Wednesday, 4 December 2013

You "CAN" Surprise in 12 Ways:


I have been planning to write this post since the time I bought the smaller sized Pringles that came in a little cute jar. I remember, while enjoying the savory flavor, I was looking at the tin and thinking of the limitless creativity, equals to happiness, this jar had come up with. I honestly felt butterflies fluttering inside me as I got super excited to see to another DIY. Though, I plan to turn it into a bubbly eye-candy pens’ holder, I know there are zillions other ways to repurpose tin cans. Here are few of the ideas that you may find inspirational if you have tins lying around your home trying to find their purpose. Ready, get set, Go!
1: CUTLERY HOLDERS  
Trust me; I wouldn’t mind taking a pause amidst every food to complement the presence of these elegant, nicely-decorated tins cutlery holders. I have no doubt that it will bump up every flavor. My mother is very picky in terms of what can sit on the table as she often categorizes things as clutter and disregard their authority to sit on the dining table. You know what, I believe, even she’ll find it hard to say no to them.
2: GLOWING LANTERNS
I love the coziness of winter nights when I sip my coffee while having my socks on. It’s such a lovely feeling to snuggle the favorite teddy bear and look across the road at gleaming lights and wet road. Rapunzel dreams to see the floating lanterns but for me not even this home- made gleaming lanterns are that bad. How quietly they light up the whole scene is simply adorable.3: CRAFT STORAGE
I don’t think my passion for getting organized is new; rather, for as far I can look back at my life, I have always tried sorting things using different containers and jars. Just imagine how joyous and fun it becomes to let your crafty bone rule your mind when everything is in its place. My mum used to have a huge collection of colorful threads and getting them sorted out always lured me to stay close to the creative sewing space of hers.
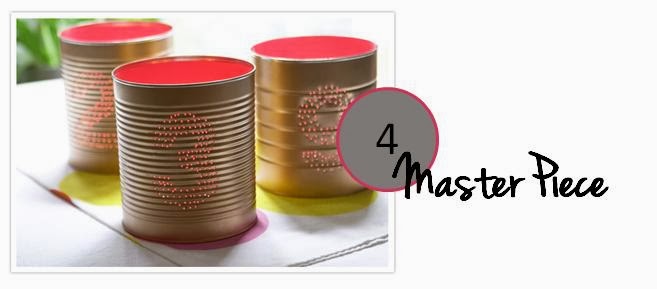
4: MASTER PIECE
5: VASES
I am such a lover of fancy white candles that glorifies the surroundings with its sheer presence. Just imagine a cake with and then without candles. All of a sudden, the charm, the happiness, that brightening effect fades leaving behind a boring setting. These tin cans repurposed as vases and candle holders are great to dramatize the counter top.
6. PEN HOLDERS:
You’ll find this idea of using cans as pen holders very common. The three Pringles jars that I have collected so far are also going to be turned into pen holders. I am planning to use them in my office. What did I do to embellish them and make them look absolutely stunning? Well, you’ll find out in my next post. Till then, stay tuned
7: TOWEL RACKS
I wouldn’t mind sitting on the toilet seat 24/7 with such a darling towels’ rack made up of repurposed tin cans on my left. Use of pretty colors, ease of grabbing a towel, and the overall neatness is so adorable. Just a flowery-patterned wrapping paper has added so much elegance to otherwise plain steel cans.
8: RIBBON ORGANIZER
I think, I should gift this to my mother. The amount of ribbons that she has been safely securing in her craft closet is overwhelming. Otherwise easy to get tangled, ribbons would nicely sit in the can and will get rolled tidily out of the designated holes. What an idea!
9: SHOPPING BAG ORGANIZER
I currently store all of the plastic bags in a shoe box, immaculately labeled. However, they are stacked on top of each other; which means, one hazard can disassemble them all. This super easy to maintain idea of storing plastic bag in a can is such a life safer.
10: LAMP SHADE
Does anyone else love lamps as much as I do? I have got several lamp shops close to my office and I can’t take my eyes off the sparkling lights, lustrous crystal, and lavish lanterns. My elder sister shares this enthrallment. But looking at the picture, I know now that making a home-made lamp isn’t that difficult after all. Where one vase can hold the bulb, a well painted tin can cover it with its majestic look.
11. LIQUID BOTTLE
Would you believe if I tell you that I haven’t ever thrown a bottle that comes with a pump? Sound silly, but it’s true. A pump bottle makes it possible to handle any kind of liquid in a hassle free manner. And now, when I found out that tin can be turned into a pump bottle, I was dazed with the ecstasy. I mean OMG! OMG!
12: WALL MOUNTED GARDEN
Green = fresh. If the space you got is too small to have a lawn, you can use walls to introduce freshness to your place.

I hope you found these ideas inspirational. In my next post, I’ll share what I have done to Pringles cans to make them look super cute and super elegant. Keep your fingers crossed. Till then,
Photo Credit: 1, 2, 3, 4, 5, 6, 7, 8, 9, 10, 11, 12

Sunday, 1 December 2013

Fabric Baskets:


Dear friends,
You must be thinking, after notoriously long break, that I may have decided to discontinue writing. Aha! Well, absolutely not! Look at the right most area of the page. Yes, you found it right. I am responsible for budgeting and reporting during day time; and, as our company’s budget is going to be presented to board of directors in the first week of December – I am near to losing my sanity. From number crunching to figures munching in excel, I literally found no time to relax let alone finding time for writing a decent blog post.
But, I am overwhelmed by the sheer loveliness of what I have to tell you today. Every Sunday, I show my closet little love to make it ready for the entire week ahead. Trust me, the closet hugs me back and makes me smile for next six days. Today, when I looked at my closet closely I found the bottom of the closet needed solid compartmentalization for my scarfs. Sadly, I couldn’t take before picture or else you would have noticed scarfs were loosely put in shopping bags. Potential for the bottom to get messier quickly was huge. I have to up-do the entire set up multiple times to keep things in order. Today, I said to myself. No more!
Not having proper time, I needed nippy solution. Inspiration came from this post and I was ready with all my tools to transform an ordinary box into a heavenly place for all my scarfs. Disclaimer: I don’t how to sew and can only use needle enough to put things together so all this hard work was the result of using stationery (yes, I used paper clips) and needle.
I started working with this carton that seemed ready-made solution to my scarf-y needs. Things that I used for this mini-project are:
·         Carton
·         Self-printed fabric
·         Paper clips & a needle
·         Lace
·         Greeting Cards of your choice


I wrapped the fabric around the carton. I had little difficulty wrapping it near the corners as I didn’t cut fabric into piece (it was just one big cloth cut for the size of the carton).


As I told you before, I can’t sew and I didn’t have hot glue I had to find something else to keep the fabric intact to the carton. I used paper clips as you can see. Also, I used the front cover of a greeting card to embellish it further. I realized that paper clips are looking offbeat and the basket needed something else to look cuter.
I took a piece of lace and covered the front side with it.
 So, now when everything seemed to be working together, it was the time to dance. Are you ready for the prestige, the final show and the big reveal? Ta da!


It could have been lot better had I not been time constrained. I could have shopped a better, thicker and colorful fabric instead of reusing a white colorless stuff. Also, hot glue would have made it dependable. But at least, it’s helping me use the bottom part of my closet more effectively. So, here are before and after.   
Do share your thoughts and if you have done such a super quick and super cheap project at home that has highlighted the creative side of you. Till then,


Thursday, 31 October 2013

Organizing Hacks : 20 Ideas to Repurpose Items ( Part 2)

Transforming a house into blissful happy home requires efforts, determination and money on top of everything else. Buying home deco’s can be a huge money eater; especially, when you are crazy about giving every corner its rightful attention. But, to me, decorating home can be extreme fun and super cheap if you decide to use the crafty bone in you for every home project. If you are ready to rock, here is part 2 of 20 tips to repurpose household items to get your inner organization enthusiastic going. You can read part 1 here.
11.  DOUBLE DUTY HANGERS:
Using walls is crucial for making a small space look more spacious, neat and organized; thus, I love every DIY project that promises to use wall area with repurposed household items. One such project is the creation of a striking and functional peg using salvaged hangers.
   
12.  CHALKBOARD TABLE:
If your kids have grown up, their room furniture should also get modified. Reclaim nursery as their new chalkboard table; and, let them have their cool organized desk to do their home works.
13.  PAINT CANS :
Salvaged paint cans be used as stationery organizers and peaceful abode for crafty supplies. If you are feeling creative, you can always decorate the outer edge with wrapping sheets, ribbons and paints. These paint cans are much easier to maintain than glass jars.
14.  MIRRORED RACKETS :
Did your rackets lose their glorious net? Repurpose them by adding mirrors to them. Multiple rackets showcased together can function as your new decorative item.
15.  GLASS JARS :
I love, love, love glass jars. I can’t let go of them and would almost always think of a new way to bring them in use again. These jars are perfect for holding stationery supplies, food supplies, paint brushes, Q-tips and other items.
16.  GET THE WIRES ROLLING :
Toilet tissue roles can keep serving you even after the tissues have been use up. Individual wires, compartmentalized in these roles, can be stacked in shoe box nicely.
17.  RECLAIM SEWING MACHINE :
Old sewing machines, with your little love, can be repurposed into a writing table. Iron stand of a sewing machine provides a sturdier base and netted legs can be painted for more stylish look.
18.  CORNER SHELF :
If you have ever wished to utilize a corner better; it’s time to make it come true. Use magazines holder as your new corner shelf. If you have it installed near entry way, it can serve you as a place to put all the mails, bills or other necessary items that you want to bring in or take out of the home.  
19.  PLANTED CUPS :
They are absolutely adorable. No worries if you don’t have a lawn to introduce some green freshness to your home. Cups that you no more use for hot drinks are ideal for plantation. Oh and yes, making faces does look cute.
20.  MUFFIN TRAY :
Organizing smaller items have always been the hardest, Ah! Why not have them baked with extra muffin tray. Muffin tray sitting on your office desk can store smaller pieces like safety pins, staple pins, rubber bands etc.


 Photo Credit: 1, 2, 3, 4, 5, 6, 7, 8, 9, 10
 
Related Posts Plugin for WordPress, Blogger...