Showing posts with label Quick Tips. Show all posts

Thursday, 10 October 2013

How to Organize Photos


I Love taking pictures and looking at them afterwards to relive the happy moments spent with family, friends and loved ones. With numerous camera clicks, challenge of keeping pictures organized increases. And, unless we have a solid system in place, it’s really hard to keep the clutter at bay. So, in case of a family reunion, we often find ourselves running to every corner of the house to find photo albums.
For ages, photos of our family were so called organized in small photo albums with capacity to hold only 50 -60 photos per album. A picture once out from one of the plastic covers kept on wandering for a new home.
This post is for every one looking for some practical tips and tricks to organize photos. Though, with digital cameras, challenge has somewhat altered its form; a sturdy system will help you keep your printed pictures and digital images both in order.

TIP 1: PURGE
You might say, “Oh! I don’t want to let go of any of my pictures.” But truth is you really need to go through your photo collection to toss or delete random and blurry camera shots, multiple takes of one scene and or any other picture that you think is not worthy enough to be saved for future. And of course, there’ll be several such pictures.
While deciding which particular photo to keep and which one to toss, ask yourself a simple question. Would I cherish seeing this picture again after five years? Your answer will serve as an antidote to your hoarding attitude. Pictures that capture people are one of the best pictures as it hold in them memories spanning over lives.
TIP 2: CONSOLIDATION BY YEAR
Once you have gone through the pictures and kept only the best ones, it’s time to arrange them in chronological order first by year and then by month. For example, let’s talk of 2013! I would keep all of the pictures taken in the month of August in one file/folder. Some people prefer organizing their photos by events. Printed photos would go in an envelope with the details of all the events happened in that particular month listed in detail on the face of envelope. For digital photos, make it a habit to take a backup every month by burning it on CD and label it properly.
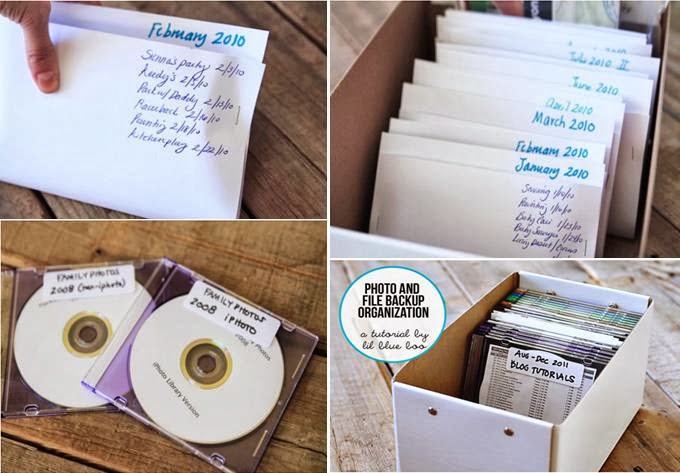

Could it be any easier to organize photos than this solution of having CDs burned for photos related to a specific event with customized outer covers? Not only thousands of pictures rest safely in a CD that rests on a CD or book shelves but it also look pleasing and awe-inspiring.
TIP 4: FOR PRINTED PIX - CONSIDER PHOTO BOXES
TIP 5: FOR DIGI PIX - CONSIDER ONLINE PHOTO SITES
Taking a backup of digital photos on CDs surely helps saving the happy moments but sometimes CDs get corrupted. Of course, we can’t leave that to chance and it’s, therefore, recommended that you consider online photos sites that give you space to privately store or publicly share your photos. You can even use Drop Box for storing your albums and saving the storage space of your gadget for something else.
Pictures Credit: 1, 2, 3, 4, 5(a), 5(b), 6

Wednesday, 9 October 2013

From Mess to Order | Practical Closet Organizing Tips:

 For countless days, I dreaded opening my closet every morning to find one complete outfit out of the messy cupboard that could be everything but a solution to my clothing needs. Most of the times, either clothes themselves fell out to give me an unexpected hug or I had to pull them out. I did with it as long as I could but then one day I realized it’s time - time to make my closet work for me instead of it to be other way round.

Today, I’m going to share some practical closet organizing tips, to turn your closet into your very own boutique.
TIP 1: START FRESH
“I'm like every other woman: a closet full of clothes, but nothing to wear: So I wear jeans”. - Cameron Diaz
I never knew what I had been sacredly holding on to in my closet until I put everything out. I have talked about strategy of ready, steady and dump before as a first step to organize purse. Literally, unless you go through this painful process of unloading your entire closet, you can’t determine what you need to keep and what is just a piece of junk, claiming your closet’s space. 
After this little scary exercise, your clothes should get divided into three piles: to keep, to donate and to just toss. After starting fresh, you should be left with only those clothes that dignify your personality. You’ll be fairly familiar by now as to what kind of adjustment your closet requires. Adding adjustable shelves dividers, installing more hanging rods and buying some sturdy hangers are some of the things that you need to consider.  
 
TIP 2: HANG AS MANY AS YOU POSSIBLY CAN
“You can have anything you want in life if you dress for it”.
The more clothes you hang, the more you are able to see. Out of sight, Out of mind is one thing that always stands true for me. Unless clothes are hanging as an outfit, I’m hard to call back when there is a need. I definitely find it easier to deal with hanged clothes than the folded ones. No matter, how nicely I treat them, folded clothes get chaotic.
Just a couple of quick tips:
o   In order to make your closet work for you, try to stick to only one type of hangers as it brings symmetry to the closet and visually everything looks pleasing and part of a big piece of puzzle.

o   If one rod is not enough to hang all of your clothes, try doubling your hanging space by installing another rod if your closet is deep enough. Had my closet allowed me, I would have definitely done that to hang jeans and other stuff.
TIP 3: MAKE USE OF EVERY INCH
“I don’t have too much clothes – I just don’t have enough closets”.
I never knew how big my closet was unless I thought creatively to utilize every inch of the closet. And here, I am talking about wall space, doors space, sides and bottom of the closet.

Trust me; just by utilizing all sides of closest you can double the storage space. Personally, I like to repurpose items that are otherwise designed for something else. Not only, it saves me money but also I feel more creative.

Just a couple of quick tips:
o   Install towel bars to hang all your scarves in a tangled-free way.

o   Use over the door pocket organizers to nicely hold folded socks, ties, belts, and or any other smaller item that otherwise feels lost in your closet.

o   No matter how tempted you might be, try storing your shoes out of your main closets. And if you still don’t want those pairs out, store them in clear plastic containers. You can find many practical shoe organizing ideas here.

o   In drawers, stack folded items vertically. This way, you’ll not only be able to see everything at once but also it will increase your drawer’s space.
TIP 4: SEASON SWAPS
At the start of every season, I show my closet little more love and for the rest of the season it loves me back. I am totally against stuffing the closet full with clothes as closet seems smaller and also becomes hard to maintain. At the end of every season, nicely fold those season’s clothes in plastic tackle boxes to give more breathing space to new season’s clothes. These tackle boxes can either be stored at the top shelve of closet (Out of reach) or at the bottom of the closet. I personally like to keep them stored under my bed – that way I can make room for my purses.
Just a little quick tip:
o   Make sure to fold clean clothes. Also, it’s the perfect time to purge all items that are beyond repair or you don’t feel like wearing any more.
 TIP 5: 5 MINUTES EVERY NIGHT
Mornings are busy! But sparing merely 5 minutes for your closet before going to bed is enough to keep your boutique in order.
These are some of the tips that I found practical to keep my closet organized. How do you keep your closet organized? I would love to hear any tip or trick that you would like to share.
Pictures Credit: 1, 2,3, 4(a), 4(b), 4(c), 5(a), 5(b), 5(c)

Wednesday, 11 September 2013

4 Quick Tips to Organize Pantry:

Cooking healthy food for your family or trying new inventive recipes is definitely fun. But this fun is often dulled by the mission of searching right ingredients out of a messy pantry. Neatly organized pantry is not functional but also eye-pleasing; thus the idea of cooking food no more remains a dreadful task. Here are four Quick Pantry Organizing Tips that can immediately restore the order of your pantry.

Create Zones:
Creating Zones is one of the most powerful techniques to get organized. Storing similar items together make it easier to get back to them when needed. You don’t have to hard-core the partitioning to separate one zone from the other. Rather, baskets can be used to store like with like.
 

Baskets are a great way to create zones.


Containerize:

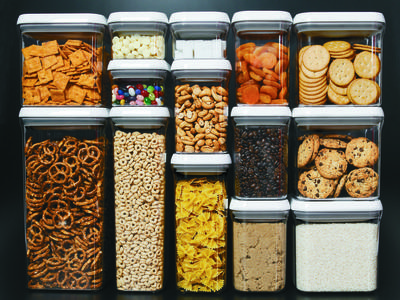
Containerizing Pantry items bring symmetry to your kitchen and proper storage with lids increases the food shelf life. You may use either of glass or plastic containers depending on your preference. Where plastic containers are sturdies, glass containers look pretty and are easy to clean.


Label, Label, Label:
Labeling Containers, baskets and other items make them easier to find. You don’t have to turn whole pantry upside down to find the spice you are looking for.


Utilize Space Efficiently:
You might have often complained about your small pantry but the truth is you have space much more than you need. It’s only need to be used creatively. For example, some spaces in pantry are hard to reach and there installing lazy Susan doubles up the spaces with the added convenience of reaching any item without any hassle.


Installing Elfa Shelving also enables making use of otherwise wasted space.


Pictures Source: 1,2, 3, 4, 5, 6, 7, 8, 9, 10, 11
Related Posts Plugin for WordPress, Blogger...